|
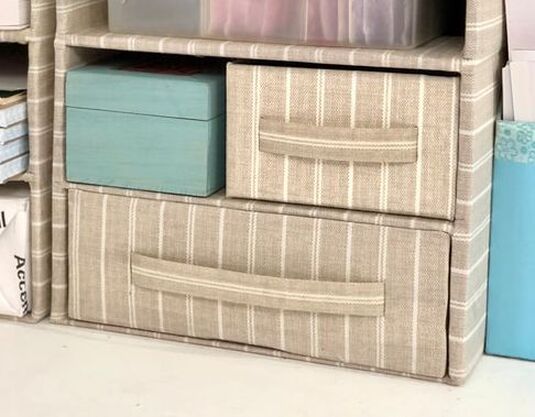
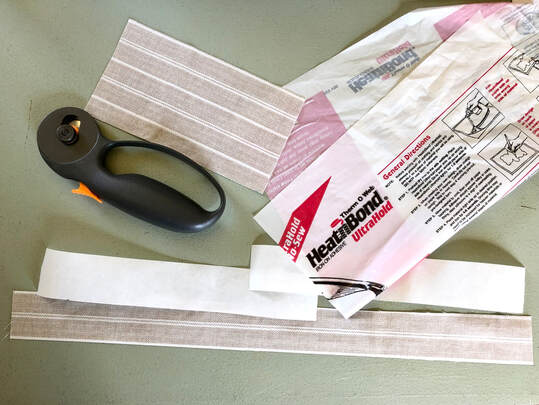
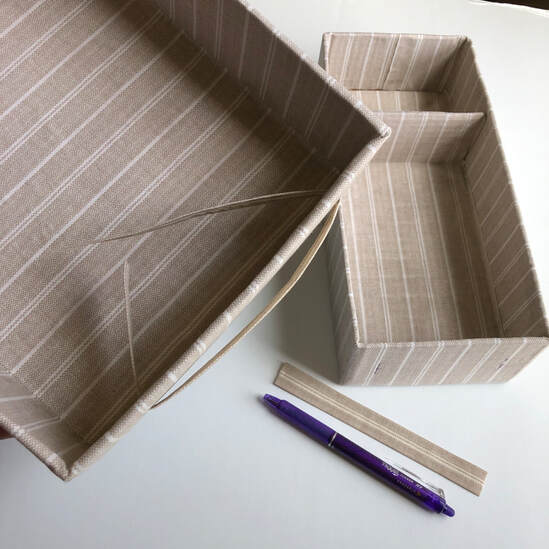
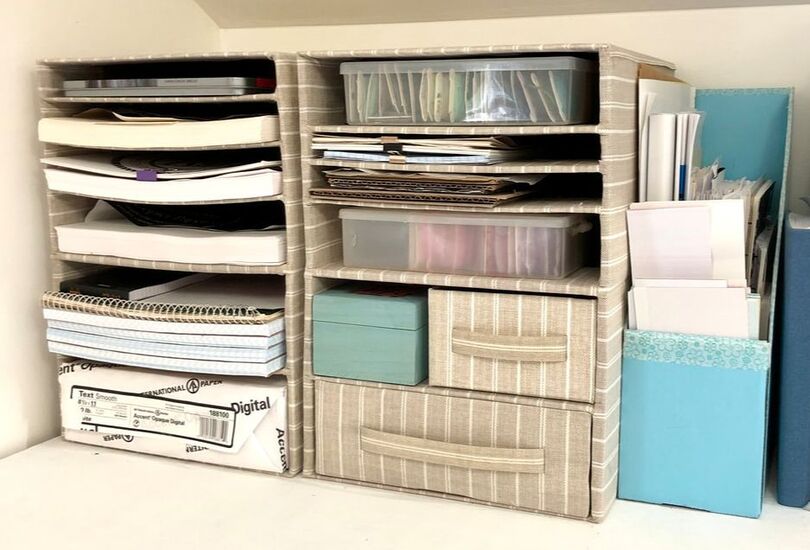
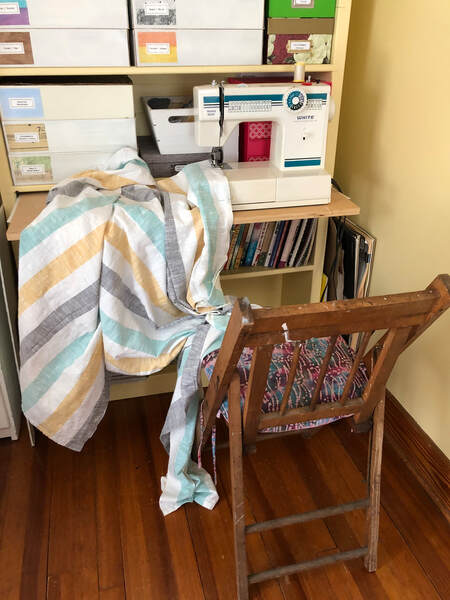
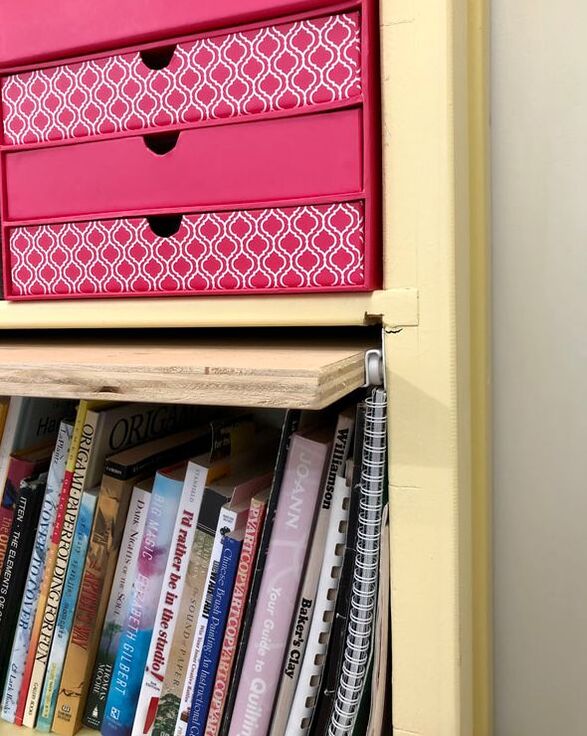
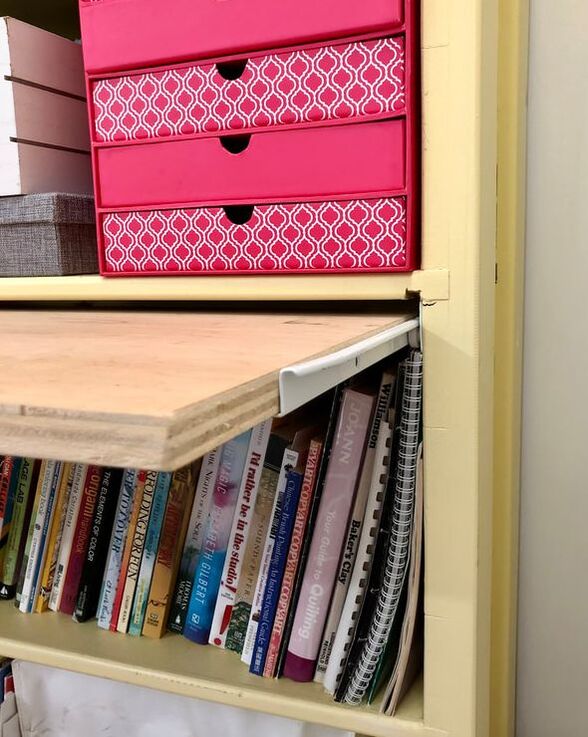
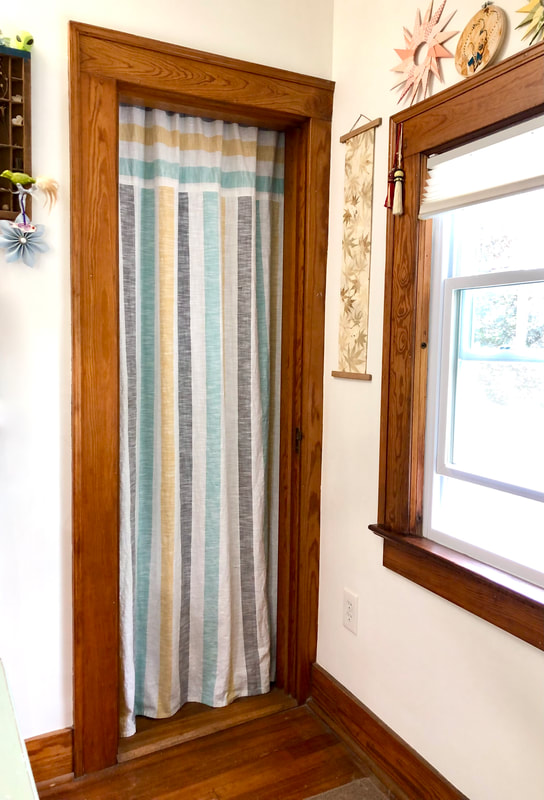
Since the last studio update, I've finished several more organizing projects. Each one I finish brings another bit of joy to my working space and I'm finding cardboard to be is an amazing building material! This is the desk top shelving unit I showed last time when it was almost finished. I wasn't able to find drawer pulls that would work for the 2 drawers so I made these strap-type pulls from the same fabric the boxes are covered with instead. I cut strips of the fabric wide enough so it could fold over for a sturdy double thickness and glued it together by ironing with Heatn'Bond. With a sharp exacto blade I cut 2 slits in the face of each drawer and slid the fabric strips through the slits. I made sure the strips were long enough to overlap when I glued them to the opposite side. I even added a divider to the smaller drawer for storing sewing needle packets. Having them stand up makes them easy to flip through when searching for a particular needle. The second shelving unit (on the left) for storing paper was also made from cereal boxes following the same process as the first. Painting a cardboard magazine holder that I already had now stores the larger papers I need for messy gluing projects and smaller papers for writing notes. I used washi tape as trim to clean up around the raw edges of the holder. Depending on my projects, I have spurts where I use my sewing machine and other times it sits idle for months. I don't have room for a dedicated sewing table so my husband came up with the idea of attaching a drawer slide unit under one of the shelves on the bookcase and attaching a piece of plywood as a pull out table. When I'm not using the sewing machine I just move it to the bottom shelf of the bookcase to store until next time. A perfect solution I never would have thought of myself. The table sticks out about three inches when pushed in which is not a problem and gives me twelve inches of work space when fully extended. When I'm not using the sewing machine I just move it to the bottom shelf of the bookcase to store until next time. A perfect solution I never would have thought of myself. I removed the closet door a long time ago because it took up so much wall space when it was open. I put a tension rod on the inside of the door space and hung a piece of muslin as the curtain. I was at the thrift store not long ago and purchased what I thought was a pretty striped table cloth. It turned out to be a shower curtain and it wasn't even the right size for my table. I thought it might be a nice touch of color for my studio but it was about 10" too short. Since it was plenty wide enough I was able to trim off a section and stitch it to the top. It's so much prettier than that dull off-white muslin curtain.
4 Comments
Thank you so much for your blog. I have thoroughly enjoyed reading it Kathy and am full of admiration for how you have organised your working space.
Reply
Kathy Johnson Art
8/30/2022 03:49:40 pm
Thank you Di. I apologize for the delayed response.This is a new blog platform for me and didn't get a notification that there was a comment : ( I am so glad you enjoyed reading this. Do you share your eco-print works on social media? I'd love to see them if they are public somewhere. Kathy
Reply
7/7/2022 09:06:32 am
Yet another wonderful newsletter Kathy! Full of usable info and inspiration. I can imagine the satisfaction you get from all those cardboard-build projects that help keep you organized. And Bravo to Wayne's brilliant solution for a sewing station!
Reply
Kathy Johnson Art
8/30/2022 04:00:18 pm
Hi Carol, Better late than never, I hope. I had no idea there were comments here so I'll be doing a little research to make sure I'll be notified next time.
Reply
Leave a Reply. |
AuthorHi, I'm Kathy an artist working in the mediums of collage and eco-printing. I'm also a rust enthusiast who loves to teach. I enjoy sharing my processes and guiding you along on your creative journey. Archives
December 2023
Categories
All
|
 RSS Feed